Using Linked Libraries In Game
Linked Library is a Blender feature that allows referencing a datablock from another blend file into the current one, allowing easier manipulation of common assets and better project management, as you only need to edit the original file to update all the references. UPBGE supports this Blender feature, specially group instances, which ones are fairly well integrated through Python. This tutorial aims to show how to use linked libraries, group instances and manage the links.
Before We Start
To proceed with this tutorial, we need some base files first. On a directory, save three empty blend files: game.blend (which will contain the references from the libraries), lib_character.blend (which will contain the actual model of our character) and lib_scenery.blend (which will contain the actual model of our ground). We’ll edit the file game.blend later, first we must create the contents of our libraries.
- lib_character.blend
Add a Monkey object, add it to a collection (M) and rename the collection to
player.- lib_scenery.blend
Add a Plane, scale it up by 5 (select plane > S > 5 > Enter > size of 10x10), and add it to a collection named
ground.
Both files should be set up somewhat like this:
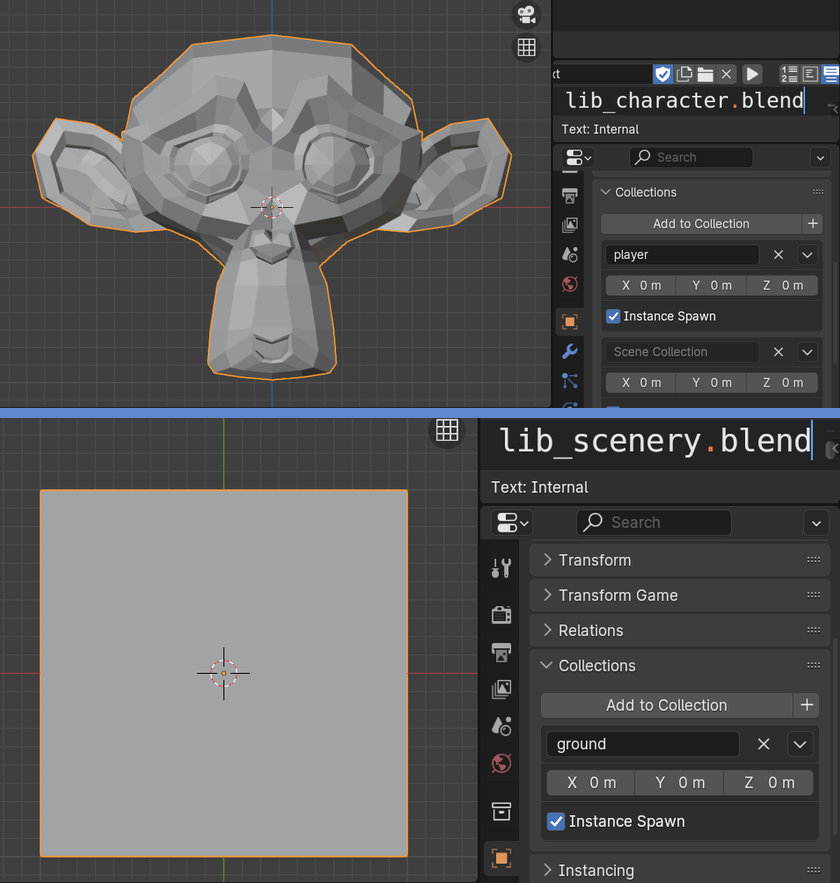
Split view of the two files
Linking Collections
Now, we’ll create a blend file named game.blend on the same directory as our previous files. In this file, we’ll do the following procedures:
Go to .
Select either
lib_character.blendorlib_scenery.blendfile.Select the Collection folder.
Select corresponding collection and double click it/click .
Repeat linking the other collection.
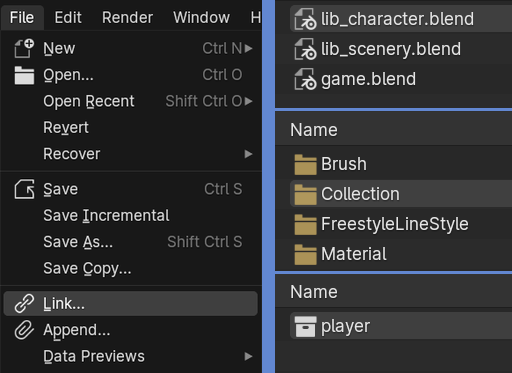
Linking procedure
If everything went right, you should see in the 3D Viewport the collection instances added. They are not editable as they are only Empty objects referencing collections from the original files. The Outliner shows chain icons, signifying those collections are linked.
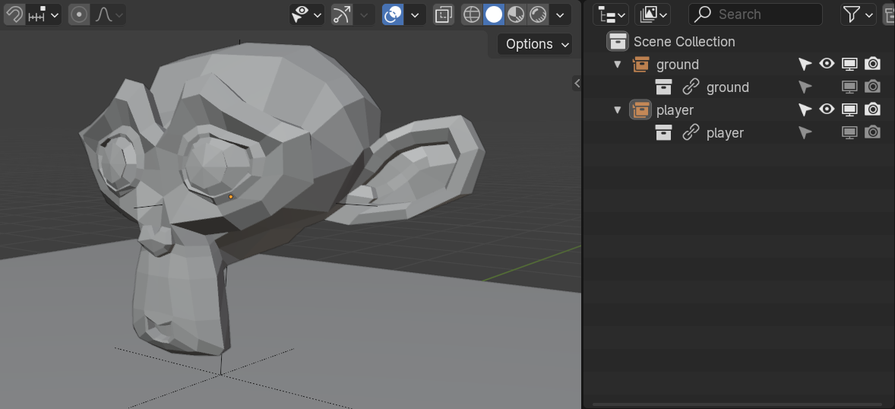
Collections instanced in game.blend scene
With the instances added, all you have to do is place them with the desired transformations, and if you need to edit all the placed instances, just edit the original file to update all the references. Pretty handy, isn’t it?
Managing the Links
If you rename or move any of your libraries to another folder, you will face a common problem: broken links. There are several ways to deal with this problem, and this section will present you the use of the Outliner to manage links.
I have renamed the library files to LibCharacter and LibScenery, which are different names from the previous ones (with underlines and only lower case characters). When opening game.blend, the editor will complain about the non-existing libraries, and our instances will be shown only as Empty objects.

Opening game.blend after libraries be renamed
To fix this, we must go to the Outliner and select the Blender File mode. On this mode we’ll see all Data-blocks in our .blend file.
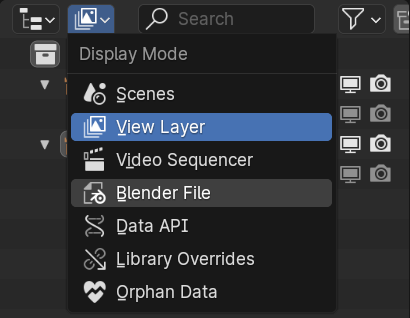
Blender File mode in Outliner
The important elements here are the references to our libraries at the bottom: they are being shown as cracked icons and their previous names. To fix this issue:
Relocating the references
Right click the references, select and select the corresponding file.
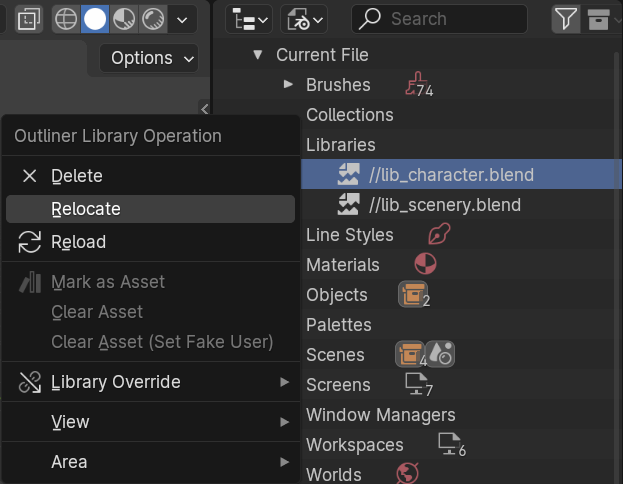
Broken references fix modes in Outliner
After fixing the broken references, their icons will change back to normal and the objects will be automatically updated in the 3D Viewport.
Understanding how to use and manage linked libraries is important to maintain a complex and healthy project environment. Much more can be achieved through the use of bge.logic.LibLoad, loading and unloading libraries dynamically using Python, but for simpler projects, linked libraries should do the job.