Moving A Cube
In this short tutorial we will introduce two essential elements for logic in UPBGE: logic triggering and game properties. These elements allows the interactivity with the set up objects.
A game property (also known as variable) is a value that is kept inside a object, allowing multiple uses. A common use of game properties is the ammount life of the player, the current song playing, or anything else that can be useful to track for later use.
The logic triggering is the act of triggering some kind of event in the game. There’s lots of ways to trigger events in UPBGE, from detecting if a key is pressed to detecting an object colliding with another, or even triggering events continuously without detecting anything. After the detection of an trigger, an event can be happen, like a object to move, a property be changed, etc.
Setup Scene
First, we must add objects to compose our scene (mouse-over 3D Viewport > Shift-A). We need three basic objects:
- Camera
A camera will allow us to see our scene from a point of view.
- Light
A light will illuminate the scene objects, allowing us to see them. In this example we’ll use a Sun light, which will illuminate all objects in the scene.
- Cube
A Cube object will be our visual feedback of our logic. As we can’t see a camera or light, we’ll move the Cube.
Once all objects were added, place them somewhat like the picture below:
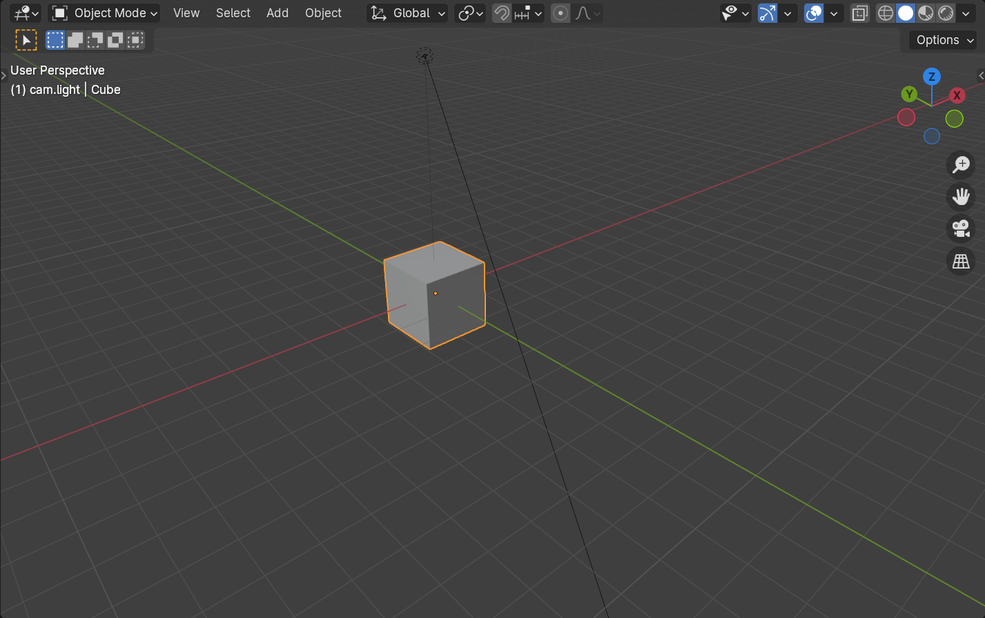
Cube at the center of the scene
Our Cube is not centered in the screen on purpose: we’ll move it in the front direction
(-Y), so it’s good to see it moving after certain point.
Adding Logic
After the scene is set up, with Cube selected, follow these steps:
Go to the Logic Bricks Editor.
Add a Keyboard Sensor through the dropdown menu .
Add a AND Controller through the dropdown menu .
Add a Motion Actuator through the dropdown menu .
Connect each brick by dragging and dropping one insert into another (chain link icon).
Now we must fill some information on the bricks:
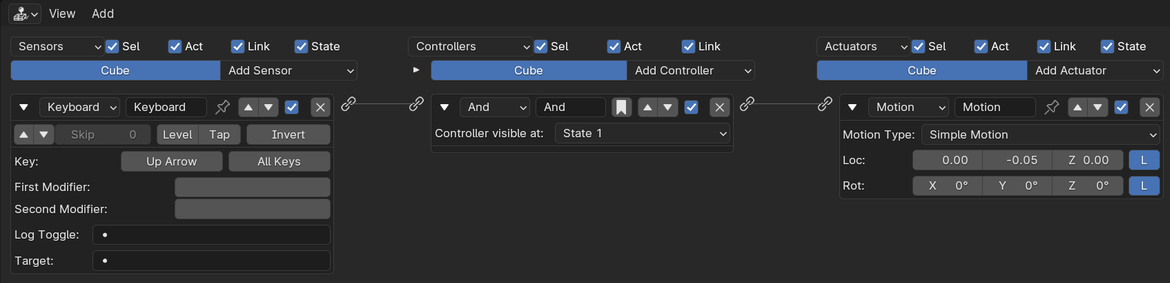
On the Keyboard Sensor, click on the
Keyfield and press a key to assign a key to it.On the Motion Actuator, insert the value
-0.05in the fieldYofLoc.
The Logic Bricks Editor should look like this:
Start the game engine (by default, pressing P while focusing/mouse-over the 3D Viewport). If you press the key you assigned to the Keyboard Sensor, the Cube will move in the -Y direction, and if you release the key, the Cube will stop.
This behavior happens for several reasons:
The Keyboard Sensor emits a positive signal when the selected key is pressed, and emits a negative signal when the key is released.
The AND Controller receives the signals from all connected sensors, and if all signals are positive, the controller emits an activation signal to all connected actuators, or an deactivation signal if one or more incoming signals are negative.
The Motion Actuator receives the activation signal from the controller and perform the motion. When it receives a deactivation signal, it stops performing the motion.
This is the basic of visual logic when using UPBGE, pretty straightforward. However, according to what you want to achieve, it can get a lot more complex.
Logic Depending On Properties
In games, the logic depends on statuses most of the time. An enemy dies when its life reaches 0, the player can shoot while its ammo is greater than 0, and so on. In UPBGE, you can do these conditions through the use of properties.
To continue, perform the following steps:
In Logic Bricks Editor (No. 1 - ), add a property through , set its name to
fuel, its type toIntegerand its value to200.Next add a Property Sensor, set its evaluation type to Greater Than, the Property to fuel and the value to
0.Connect the Property Sensor to the AND Controller, along with the Keyboard Sensor.
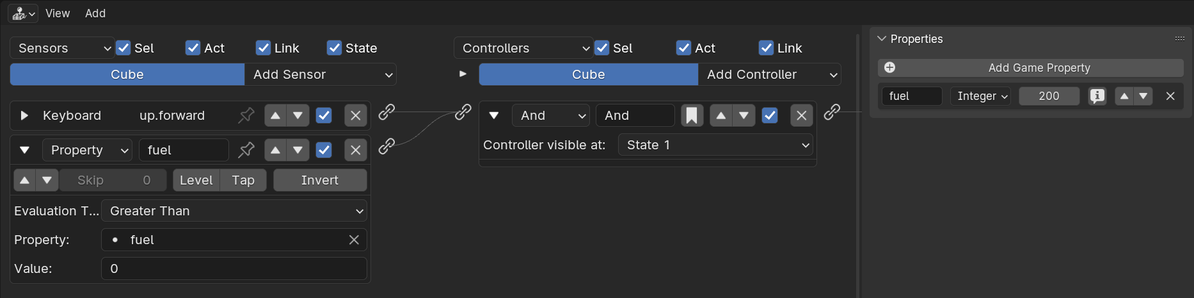
Property Sensor (left side) properly filled and Fuel property added (right side)
This makes our Cube move only if the value of fuel is greater than 0. You can set the property fuel to 0 and play the game, and you will see that the Cube will not move. However, it would be good if we decrease the value of fuel as our Cube moves, until it reaches 0. To do that, do the following steps:
Add a Property Actuator and connect it to the AND Controller.
Set the mode of Property Actuator to Add, its property to fuel and its value to
-1.Enable the pulse mode on Keyboard Sensor.
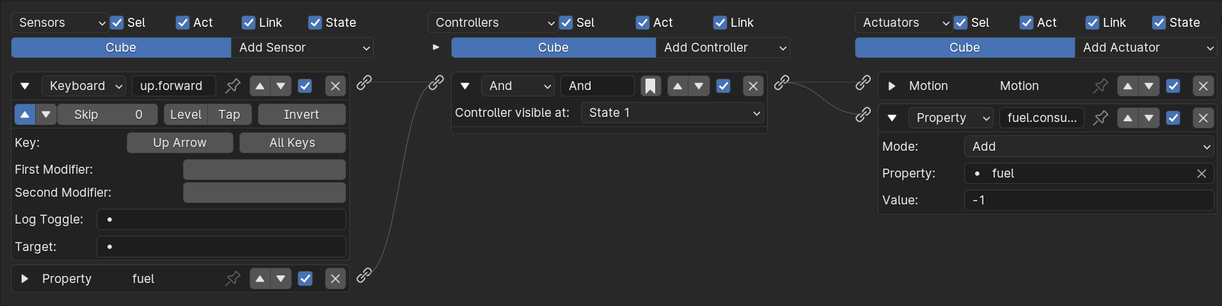
Fuel consumption logic: Sensors > And Controller > Property Actuator
There’s a new factor involved here: the pulse mode on Keyboard Sensor (blue up arrow in top left corner). By default, a sensor sends a single positive signal to the controller when active, and a single negative signal when inactive. The pulse mode makes the signal be sent each logical frame (default is 60 frames per second). This is useful for us now, because we need our fuel to be decreased while we press the key without the need of releasing and pressing it again.
Go ahead and play the game. The Cube will move and, after some time, it stops. It happens because the Property Actuator has decreased 1 unit of fuel each frame, according to the Keyboard Sensor pulse mode, and when fuel reaches 0, the logic of the Motion Actuator doesn’t respond anymore. It would be good, however, to see the value of fuel be decreased over time. You can do this by enabling the debug flag on the fuel property (), or , as shown in the figure below.
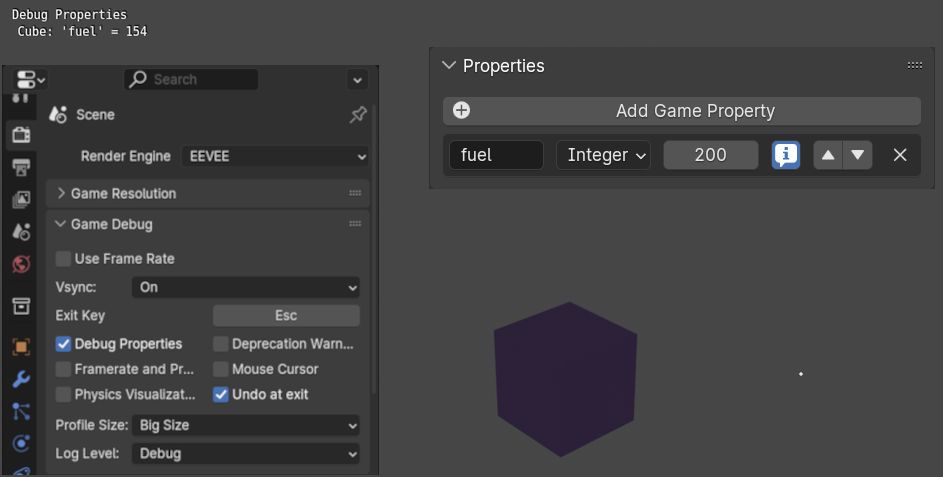
Debug settings and display on screen
Conclusion
The goal of this basic tutorial is to show how to work with the visual logic and properties on UPBGE. There’s more to be discovered about visual logic and properties, like other Property Types, the use of States with logic bricks, etc, and those subjects can be better understood on their own pages.